

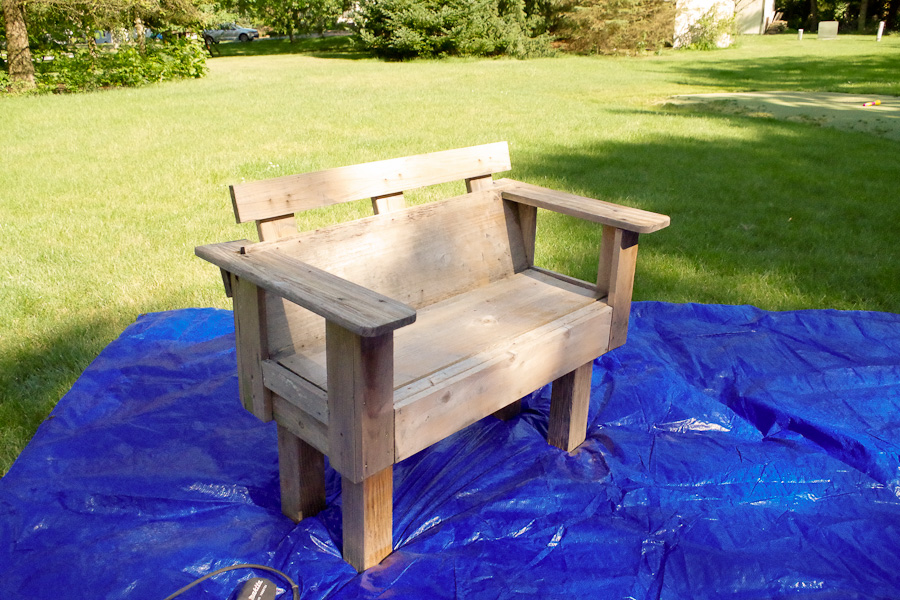
This particular bench was given to me and had just been coated in a stain and poly. I doubt the person that made it even put an exterior finish on it because it DID NOT last long at all.
(This is a sponsored post where I received free product in exchange for my honest review and opinion, and there are some underlined affiliate links in this post which simply means that I get a small commission if you purchase through those links, at no cost to you. More details can be found in my Disclosure page about sponsored posts and affiliate links. Thanks for supporting my small venture!)
Here’s how we fixed it up:
SUPPLIES USED:
- Beaten up outdoor furniture
- Orbital Sander
- Optional: corner sander
- Sanding discs
– 120 grit and 220 grit
- PaintWiz Turbine MAX Sprayer
from FujiSpray
- Behr Exteriors Paint – “Shasta Lake”


Power Washing and Sanding:
First, we power washed it. I forgot to take a photo of this because we did it at the same time we power washed our deck. I’m sure you can imagine just spraying every side of this with a power washer. It knocks off all the dirt and the weathered wood.
Next, I sanded it down. For an indoor project I probably would have done a more detailed sanding with my orbital sander then my corner sander, but since this is just for outside for my kids to sit on while playing in the backyard, I didn’t worry too much about all the crevices.
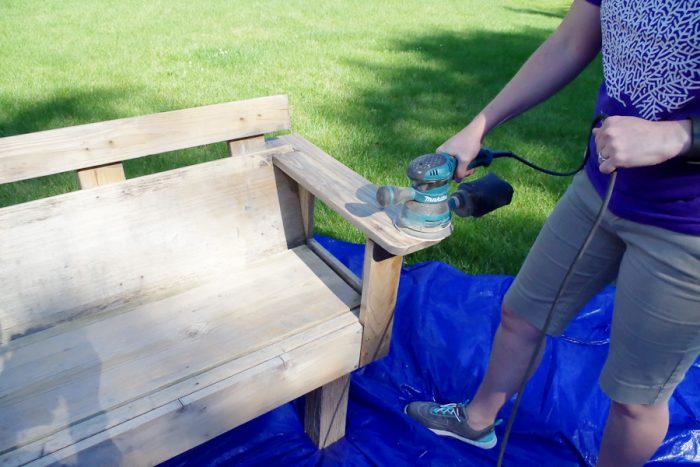
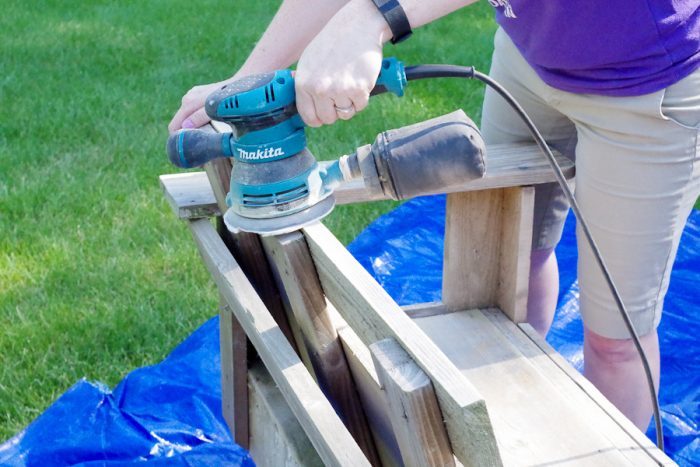
After sanding, I wiped off the dust, then got ready to paint.
Painting:
Painting this was an absolute breeze using the PaintWiz Turbine MAX Paint Sprayer
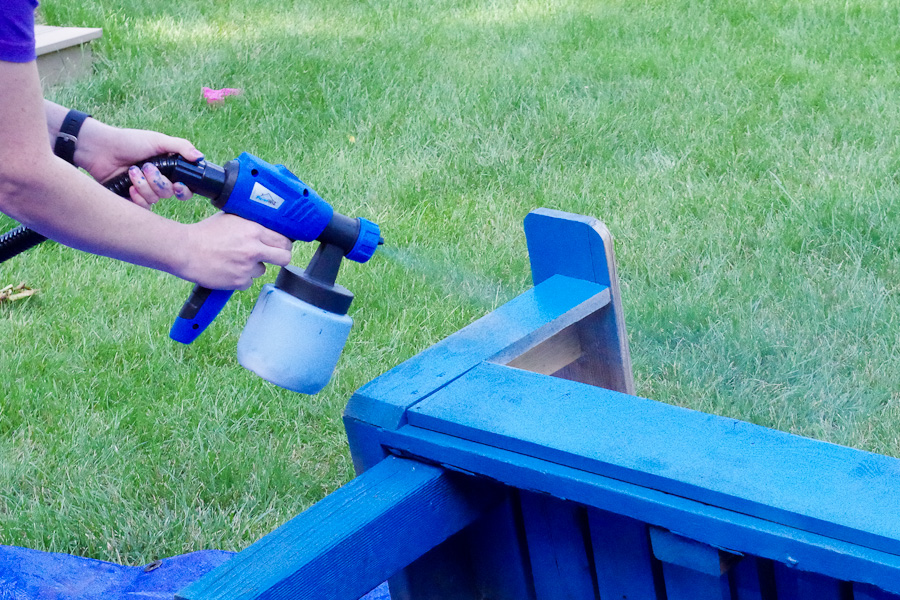
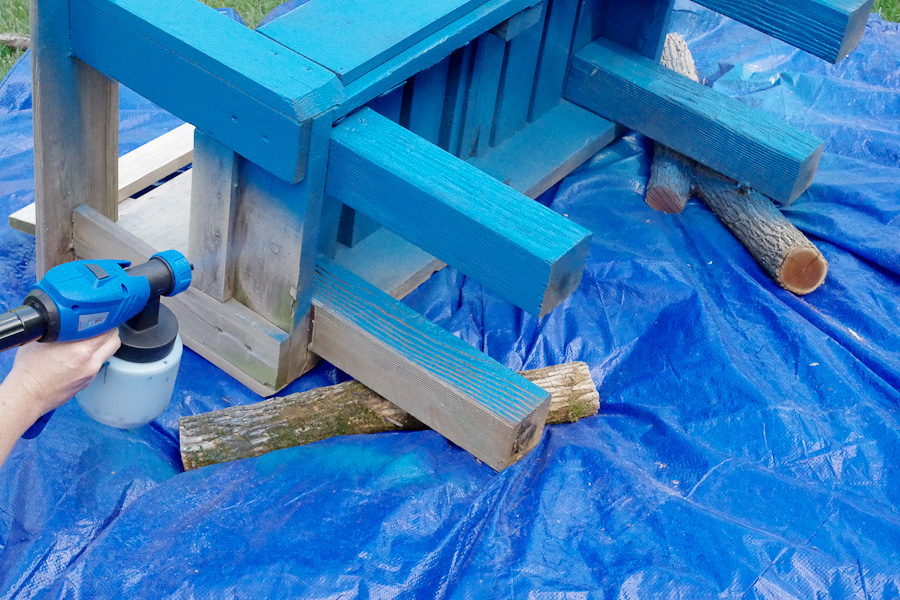

I just sprayed the paint onto the bench, being sure to hit all angles. It was helpful that the sprayer had a setting to control how much paint flowed through. I love how FAST it is to use a sprayer and really appreciated that on this project. The first coat was done in maybe 10-15 minutes? Same with the second coat a few hours later.
The greatest thing about this sprayer is that I don’t have a bunch of brushes or rollers to clean afterward. Yes, you definitely have to clean the sprayer parts as soon as you’re finished, but to me cleaning plastic parts is a thousand times easier than cleaning brushes and rollers, I swear I never get all that paint out of those! The Max sprayer makes cleanup easy because it breaks down to each component so you can be sure to get all the paint off. This sprayer will definitely come in handy!
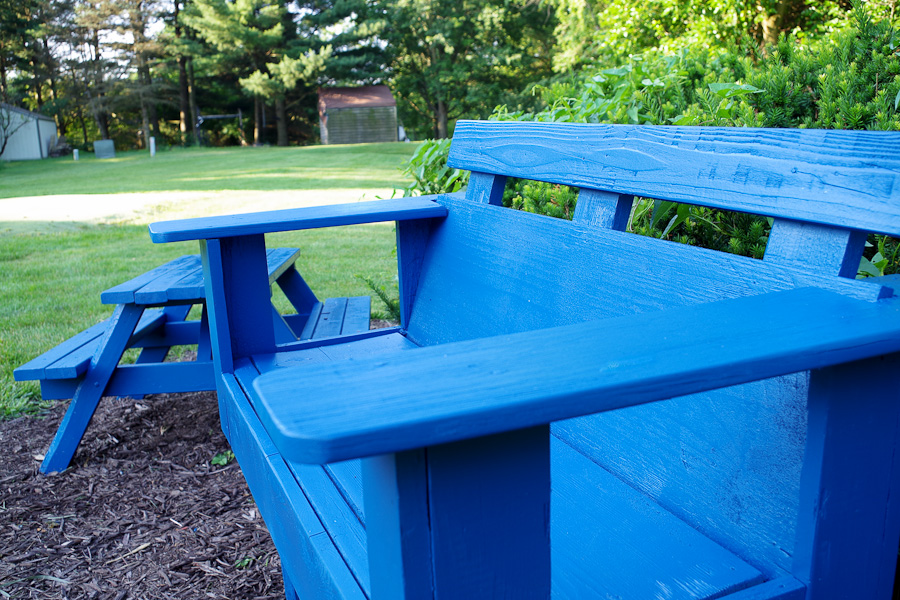
Project Refinish Outdoor Furniture COMPLETE!
Here are the finished photos! The paint went on evenly and smoothly with no dripping. When I use a brush I swear I ALWAYS have drips!


As you can see, I had so much fun that I threw my daughters little wooden picnic table into the mix and sprayed it too!
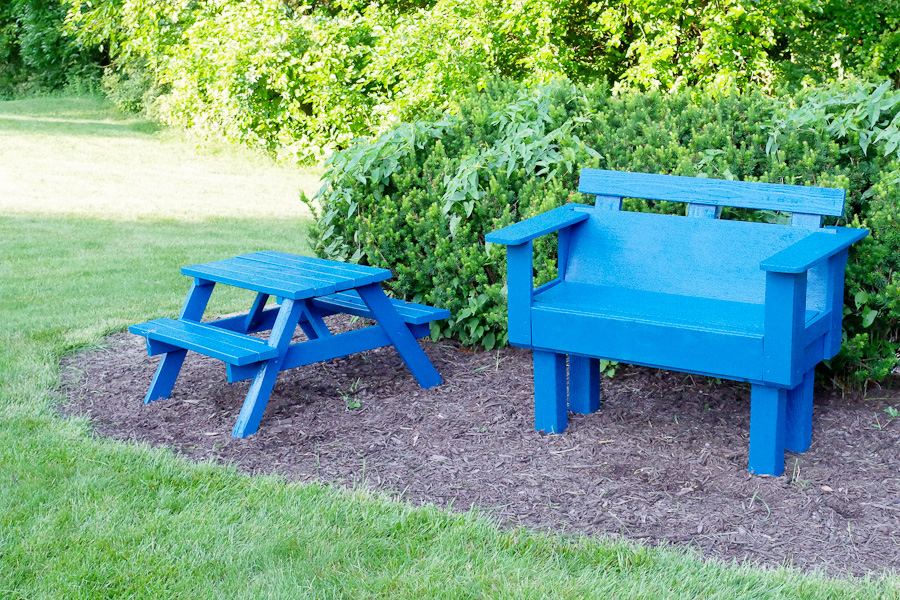
I love the way my bright blue furniture looks out in our yard. It’s the perfect spot for my kids to take a rest while they are running around or playing with their friends.